"Today You are You, That is truer than true. There is no alive who is Youer than you." - Dr. Suess

Tuesday, May 22, 2012

Happy Birthday

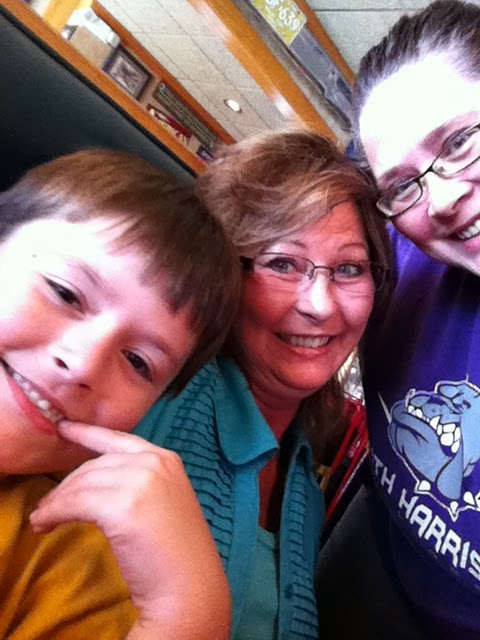
This hop is dedicated to Lisa Peters and her daughter Becky who are lucky to share a birthday!!! How awesome is that to share a birthday as a mother and daughter which is what we are celebrating today!!!!
If you remember, Lisa became a first-time grandma this year and Becky is the mother of Maxwell .... Let's Celebrate!!!!!
Bring on the cake!!! ...
Watch out for the candles!!!!
Let's have some balloons and sprinkle it with confetti!!!!


You ask for prizes, well, you're just in luck as Lisa is also the proud owner of Scrapping with Lisa's Designs and is offering $25 in FREE files!!! Woo hoo!!!!
To qualify for the prize, you must stop and visit all the stops along the way and remark! Don't forget to wish Lisa and Becky a Happy Birthday too!!!

I'm sooo glad you were able to stop by and visit but I don't want you to miss a single party along the way!!!! The hop begins with Lisa at http://handmadewithlove-lisa.blogspot.com/. If you have arrived from EVILA then let the party begin here!!!!


 So what do you think?  I LOVE LOVE LOVE this page.......In fact I am already back in the studio designing some more to go with.....I'm thinking this will be a 4 -6 spread layout to showcase all of my faves from my little guys 1st Birthday!  I think I am also going to make up some similar Kits for one of my work shops!
 
I first got my inspiration from another page had seen and then you know how that works you get going in one direction with know Idea where you will end up! :)
 
My paper choice was from the Fanfare Kit..........find some like this HERE!
 
My two main BT duos are 6" and matted onto white cardstock and then I covered the seam with some festive party hat paper that I had a little bit of............My Main focus of this page will be a 5x7 of group photo that we took of everyone that was at the party!  So I  cut the Red cardstock 51/2 x 71/2 because I just want a little edge.
 
My small mats are 31/2 x 3x1/2 and I will be using 3x3 photos here...........The Number one is an Irrisistable which I just LOVE to use.........these little guys are the most fun ever!  If you havn't used them you should try them!  You just ink them with what ever color your working with and then wipe them with a sponge..........the irrisistable part ALWAYS stays white!!!  LOVE LOVE LOVE! :)    Check out while supplies last!
 
I finished off with some balloons that I cut out and pop dotted and some confetting strings and a foam Number 1........and I used actual bow ribbon for the balloon ribbon which I though was a fun choice!
I Hope you found a little inspiration here today and of course I have a little goody bag of my own!  Super Easy to win too!  All you have to do to be entered in my drawing is become a follower of the little scrap corner both here and on facebook :) Then leave a comment on facebook screaching.....HAPPY BIRTHDAY GIRLS!!!!  Thats it :)

 
In case you get lost in all the candles, balloons, and streamers, here is the entire line-up :)

Happy Birthday to Lisa and Becky Blog Hop Lineup:

 LISA

 LYNN


Happy Happy Birthday to Lisa and Becky!!!!!!


XOXO


Friday, May 18, 2012

Our Week at a Glance Wall hanging!

Ok so who doesn't love pinterest???  Oh I am so addicted it is my one stop source for inspiration!  So when I saw this ADORABLE idea I just had to run with it........................So I can say that I did see a couple of different versions, however no one included details so I can only tell you how I did mine :)


If you like a weekly then How cute is this???  I just LOVE it!  And seriously this is one of those
 5 minute projects that ALL of you busy people even have time for!

I started out with a very simple collage frame........I went with this one only because I had it on hand but seriously friends.........any frame that suits your fance will work! 

Mine is 4x6 openings and I am a bit of a pink girly girl so I chose to work with paper from Sophia because you just can't get any more girly then that!  But again.......this is can be anything!  And the best part is that you can change your papers for the holdiays, room colors.....the sky is the limit!!

After my papers were trimmed and in place I used a perm marker to hand write in different fonts Our Week, and then the days of the week and that my friends is it!

You Now have a nice large weekly DRY ERASE command center for your spouses and kids to refer to...................I change my week once a week and let it be.............Every one knows what our plans are and goodbye to miscommunications!

Hope you like it AND I hope you were inspired to try your own version!  And if you do I would love for you to share them on my facebook page so we can see what you come up with!!!!


Now I also want to remind all of you of the next blog hop......It is going to be May 23........Happy Birthday to Lisa and Rebecca blog hop...........Come hop through for all kinds of birthday project inspiration! 

As Always..........

XOXO


Friday, May 11, 2012

Weddings and Bridal Showers

I LOVE SPRING!  And as the weather gets better and better it gets harder and harder to stay in my studio!  I want to be out in the garden with the birds and butterflies and my boy!  Love this time of year!

However it is also the time of showers and weddings and wonderful things like that which keeps me focused and on point because there is alot to do right now :)

I wanted to share with you this very simple and tastefuly elegant card I worked up yesterday :)  Some of you may have already seen it on facebook but I thought I would give a few details about the recipe of this card :)


I started with a plain white card stock and folded my card to the size that I wanted it to be..........I am always partial to a little longer narrower card myself but this kind of design is so simple that any size would work :)

I matted 3 shapes and sizes of white card stock to some black cardstock and made the design I chose with some stickers I had lying around..........however if you have a flourishes stamp that would work even better!           

The I stamped the word love on the top piece as my card is for a bridal shower however YOU should let your creativity flow! 

As usual I had to have some bling but I would have actually chosen smaller if I had them........or opaques would be really cool too!  Top it off with a bow or some other type of embellie...and Violia!

Hope you find some inspiration today!


XOXO


Wednesday, May 9, 2012

Happy Last Day of School!

For those of you who feel like you are beginning to notice some kind of theme going on here at the scrap corner.......well, LOL that is because you are!

It is my little guys last week of his very first year of school so we are partying it up around here!  For those of you just now checking in...........We've had teacher appreciation, thinking of you, and now Happy Last Day Of School Treats!!!

I loved ...LOVED ... making these awesome little jewels with my little one!  And if you chose to make these......I would definately include your kids!  SOOOO much fun!


These did take a little time so that you could really get all the details but so much fun that it didn't even matter!  And I can almost bet you will likely be the only parent bringing such fun treats for the kids!

Recipe:

3 1/2 x 4 1/2 yellow card stock
3 1/2 x 1/2 pink card stock
1" circles in pink card stock
Pinking shears
adhesive
and hersheys kisses


Take your Yellow card stock and trim one of the shorter edges with your shears....this is going to give your  pencil that just sharpened look :) Then in the middle of one side write .... HAPPY LAST DAY OF SCHOOL!   

Line your kisses up inside in the middle.  Use one for the lead, and a flat side for the eraser end...the rest of them it doesn't matter how they go...........I used six for each pencil that I made :)

Wrap them up and secure with tape.............I used my scrapper tape, but I found it needed something a little more secure to hold it together!

Attatch a pink circle to the end and wrap a pink strip around it to form the eraser

I used the computer to type on white stock.....your friend.........and cut them out into small squares and matted those with a coordinating paper. 

Finally tie your little name tags on the eraser end with a coordinating ribbon......in my case I chose to coordinate my ribbon with my writing :)

Hope you enjoyed this tutorial, and have fun creating these little guys!


XOXO


Tuesday, May 8, 2012

Have a friend that is Blue? Try sending an I'm thinking of You!

Any time that I have a friend that is down.......I just can't help trying to cheer them up!

Today I made this adorable thinking of you card for just such a purpose!

I used papers from Sophia, which is discontinued now..........but you can find other papers similar Here

I started with white cardstock base and then added my scraps.................I actually printed out the thinking of you on my computer before I began my project..........

I did the final horizontal trim with CTMH borders and butterflys from the my acrilyx stamp sets....... I put a cute little daisy white embroidery thread and a little pink bling bling!  Hope you like it!


Let me know what you think! 


XOXO


Teacher Appreciations!!!

School Days School Days Good old golden Rule Days!

If you have kids then you realize how important those wonderful teachers are that help to shape their minds........

And at this time of year as the school year comes to a close how great is it to show your appreciation to them?

My project today is a teacher appreciation gift that any one can make!

It is so simple and yet so cute!


This little cutie was made with basic card stock :) No special paper packets here!  I chose planting a seed, but you could use a variety of sayings.............."helping me grow", "giving me a good start"......anything plant related would be cute!

Now my favorite part of this little guy is the chalk board!  This also can be made with cardstock......and for the writing....I went out side of the box and used a white out pen!  It gave me exactly the look that I was after!! 

Add a few embellishments.....in my case, your abc's and 123's, and an apple for the teacher........

And you're ready to let that special teacher in your life know how much you appreciate all she has done for your little  ones!

Hope you liked it......I would love to hear what ideas you walked away with!


XOXO